Suggestions to get the most out of iMenuPro.

iMenuPro lets you create multi-page menus. Here are 2 easy ways to get to page 2 and beyond with a new menu.
Method 1: Keep dragging Menu headings or Food items onto page 1 until they spill over onto page 2 (if the items won't fit on page 1, iMenuPro automatically creates a page 2 to accommodate those items.
OR
Method 2: For any Menu Heading on page 1, edit the heading and check the New page or Column box under Layout Tweaks. iMenuPro will then create a page break (pagebreak) before this heading which will move the heading to the top of page 2 (this method applies to menus where the overall number of menu style columns is set to 1).
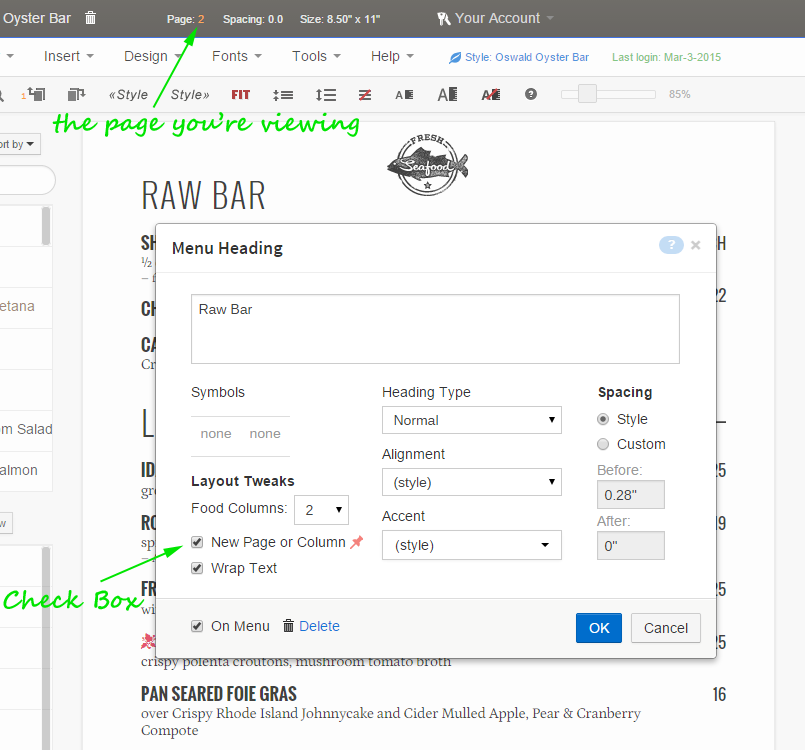
This heading will appear at the top of page 2 because New Page or Column is checked
Tip! With a multi-page menu, the page buttons on the toolbar display your previous and next page numbers. To flip back and forth between pages, click previous page and next page.
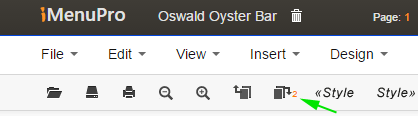
In this example, clicking will navigate to page 2.
As an alternative to the above, you can create individual pages as separate menus. This will give you the option to apply different styles or design layout changes to each page and will also speed up the app itself since 1 page menus require less processing power.
Follow the steps below to add a cover page to an existing menu.
Edit > New Heading or click the NEW heading button for a new heading.Custom. For Before enter 0, for After enter 100.Accent to (none), and turn on the ⍉ page spacing option by checking it.OK. The heading will now appear in your Headings list as {blank}.
Your {blank} heading will now fill page 1. As such, you can freely add floating text or images to the cover page. But any menu text you add will get pushed to page 2 since the {blank} heading takes up the whole page.
To change that, just edit the {blank} and change the space After to a smaller value.
If your menu had a footer, and you don't want the footer on the cover page, use Insert > Footer and set Remove from page: to 1.
If you had inserted images or floating text on the page before adding the cover page move them to the next page by right clicking them and selecting Move to next page.
To remove the {blank} cover page heading entirely, just delete the heading in the heading list.
Follow the steps below to add your logo or any of your own custom images to your menu.
Insert > Uploaded image and click the Upload Image button and find the folder or location where you saved your logo or image file.Open and the image should appear in the Preview window.OK and the image will appear in the upper-left corner of your menu. Now click (and hold) and drag it freely to position it or click (or tap) it once to edit to change its size or location.Tip! If you need to make room for your logo (the most common scenario is making room at the top) try using Custom Spacing, which is available on all Headings and food items. Simply click the heading that's topmost on your page, then click Custom under Spacing and enter a value for Before that's enough space for your logo.
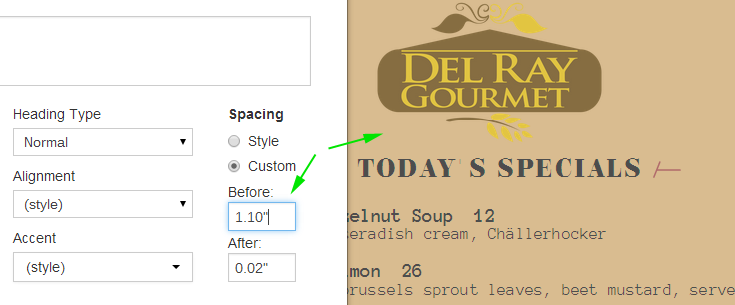
Example of using Custom Spacing to make room for your logo
With iMenuPro you can use columns on any menu. Here are two methods to do that.
Select Design > Switch Menu Styles, then change In this many columns to however many columns you want.
This will put your entire menu into newspaper style columns (Title and subheadings at the top of page 1 automatically span).
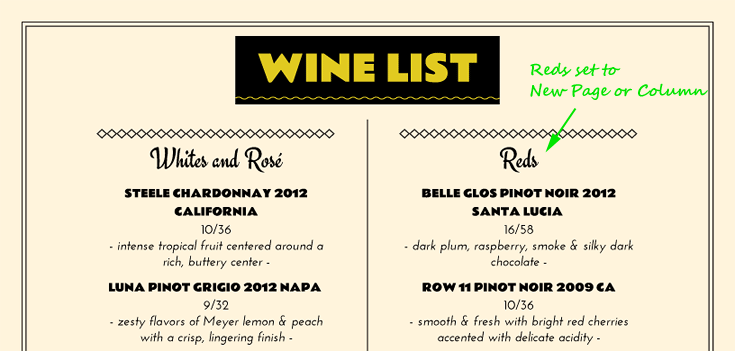
2 Menu columns with spanning Title heading and 'Reds' set to New Page or Column to pin it atop column 2
Food Columns work best if you need one or more small sections of your menu in 2 or 3 columns, but want to retain the overall feel of a single column menu.
Select Design > Switch Menu Styles, then change In this many columns to 1.
Then edit any Heading on your menu (except subheadings) and set Food Columns to 2 or 3.
This will put the foods directly under the heading into columns but leave the heading and the rest of the menu in a single column.

Example of SIDES in Food Columns

Example of SIDES in Food Columns
In order to facilitate the automatic balancing of columns (as in the above example) Food Columns use a left-to-right ordering scheme where your first item goes into the left column, your second item goes into the right column, and so on. So it's often a good idea to set up the order of the items first, with food columns turned off, and then simply throw the switch to turn them into columns.
For example, a heading with 4 food items like this:
-- Heading --
item 1
item 2
item 3
item 4
Turns into this if using Food Columns:
-- Heading --
item 1 item 2
item 3 item 4
The two different column methods cannot be mixed together, but there are several spanning options described below that can be used to create variations within each method.
iMenuPro has two general column methods described above. But you can also span columns in certain sections to create variations.
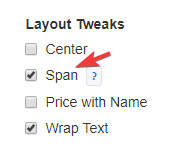
Span means to 'break out' of columns and stretch across the page within the page margins. In other words, put the item back to single column mode.
For some cases, certain headings automatically span. Title headings and subheadings at the top of page 1 automatically span since that's typical of a menu Title section. All other items in the Title or End sections of the menu can span as well, but require the span tweak to be checked.
Example of a Title Heading that spans at the top of menu
Menu columns puts your entire menu into columns, like a newspaper.
But there are also two special sections, at the top and at the end of your menu, that can have spanned items.
------ Title section ------
Col 1 - Col 2
Col 1 - Col 2
Col 1 - Col 2
------- End section -------
------- Menu footer -------
We refer to the top as the Title section and the end as the End section. You can span any heading or food item in these special sections. And title headings and subheadings automatically span if in the Title section.

Example of headings and a food item spanned in the Title section
Both sections are optional, and are only in play when using Menu columns.
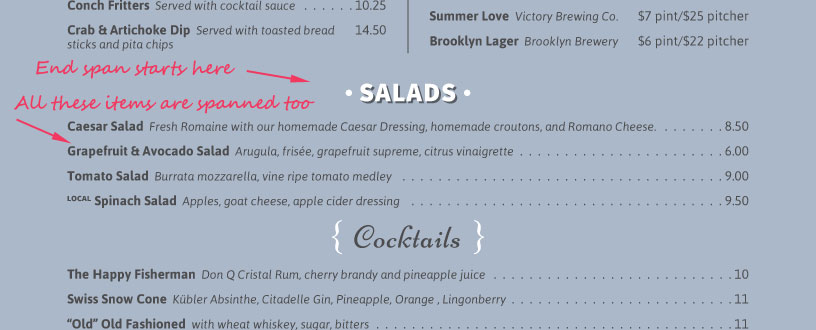
Example of headings and food items spanned in the End section
Other than checking the Span tweak and then dragging the item into the appropriate section, there's nothing more to do.
To span an item at the top or end of your menu:
Span tweak for the item and then drag or move the item into either section.To break out of the Title section, and enter the Menu column section:
To start the End Section at the end of your menu:
Span tweak checked. Any number of items can be spanned there.Food columns let you put selected food groups into columns, while leaving your overall menu in 1 column. But what if you want to add text in the middle of the food columns and have it span across the columns?
You can do this automatically with subheadings. And also with food items that have the Span tweak checked.
Subheadings, and food items set to span, will span across food columns if they are:
Example of subheadings (in white) that span food columns
If you're using Food Columns and you have an odd item out – that is, 3 food columns but 4 items, or 2 food columns but 3 items, or any variation of such – you may want that last item to be centered and spanned to make your menu more aesthetically pleasing. This is one way to do it:
Span (and optionally check Center) and then click OK
Example of spanning and centering the last food item in a food column group
If you run out of page space, but need to fit a few more items on the page there are several things you can try without having to change your paper size.
File > Page Setup. Depending on your food item sizes, this will usually allow an item or two more at the bottom. Page margins affect all menu pages.File > Page Setup. Page margins affect all menu pages.Tools > iMenuPro App settings and change the Page Spacing adjustment per click setting.Fonts. This is often preferable since shrinking all fonts at once could make smaller fonts hard to read on the final printed menu. Any font changes apply to all menu pages of your menu.File > Layout Options and change the value for Line Spacing. Line spacing affects all pages of your menu.Boxes really make foods stand out. But sometimes you might want put a box around a group of items too.
To do so, choose a normal style box (single line box, solid box, dotted box, etc.) and make the adjoining items have the same type of box and the exact same color. If your items are in the same column and close enough together (not spaced more than about 1/2 inch apart) iMenuPro will surround them automatically with your chosen box style and color.
Example of solid box around 2 food items
Example of dotted box around a heading and 3 food items
You can right-click most headings and then select Box this section
iMenuPro will then clone the heading accent/color combo (if it's box type accent) onto all the items in the section. If you don't like the results you can immediately use Edit > Undo to revert the change.
Note To disable (un-join) boxes that are automatically joined together, simply tweak the accent color (even a tiny amount) for the box above or below.
Note This feature works with food columns when all items in the group have the same accent and color and at least one item at the top of the group is spanned, such as a subheading or even a {blank} food item.
To reorder an item, drag it while on the menu. To rearrange a menu by moving an entire menu section (heading and food items under it), use right-click Move Section Up or Move Section Down.
Depending on your content and page size, you might need slightly bigger fonts or slightly smaller fonts, all-around for the whole design. Rather than using the Fonts menu to change individual fonts, you can click or to shrink or grow all fonts (excluding floating text) using a secret-sauce algorithm that reduces or enlarges the fonts proportionally to keep your design aesthetics intact.
The easiest way to change a font (or fonts) that come with a Menu Style is to use the Fonts menu. For example the Fonts menu lets you change all food item names to bold, or change their, color, font family, etc. with one click. You can do this with any font element, so all descriptions, extras, headings, etc. can be changed with this method.
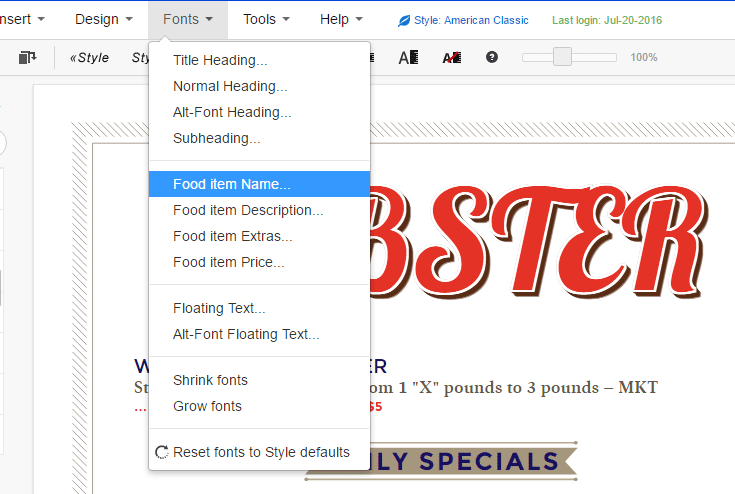
Changing menu fonts for all elements at once
However, what if you need to highlight or emphasize just a single word or phrase within the text of a single item? You can do this too, using iMenuPro's Bold Bite tags.
Bold Bite tags are similar to what's used in HTML coding to change the text-decoration properties of website text. They're special text that surrounds your normal text at the start and end of the word or phrase you want to make stand out.
The available Bites are listed in this help guide under the Tools & Settings section, and to use them on your menu you should check the box under Tools > iMenuPro App settings that says Convert Bold Bite tags. If this box is not checked, the tags can be left in your text and iMenuPro will ignore them when drawing your menu.
Here's an example of how they work:
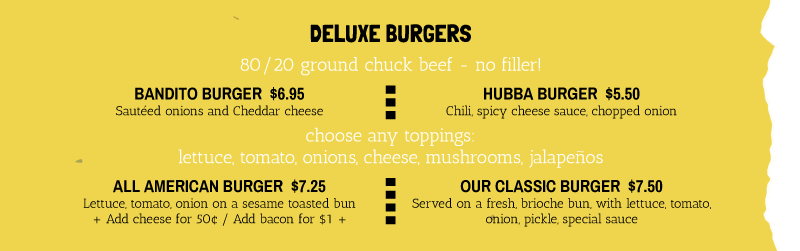
For this item, we've changed one word to Bold and another two words to red (the item's accent color) to make them stand out. The codes to do this were <b> and </b> for the bold word. And <c> and </c> for the color change — the first is the start tag and second is the end tag.
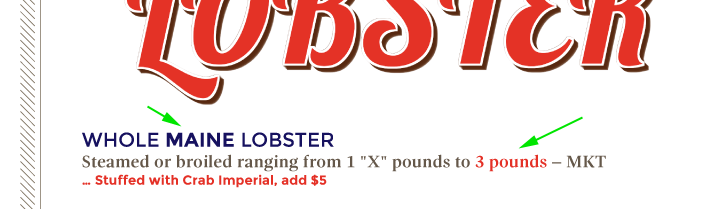
Here we used the Bold Bite tags <b>MAINE</b> and <c>3 pounds</c>
Fonts menu.
iMenuPro includes hundreds of ready-made Menu Backgrounds but you can also use your own image as a background or watermark. Here's how:
Insert > Uploaded ImageUnderneath Text. This will move the image underneath the menu text. If you have other images on your menu that are already underneath the text you can right-click the image and select Send to back or Move to front to send the image to the back of the line or the front of the line so to speak.View > Disable menu text to allow access to the image without the text getting in the way. When you're done, use View enable text to re-enable the text. You can also do this by clicking the orange shortcut menu text at the top, upper right of the status bar.Lighten and select a lightness value that will allow your image to work as a background.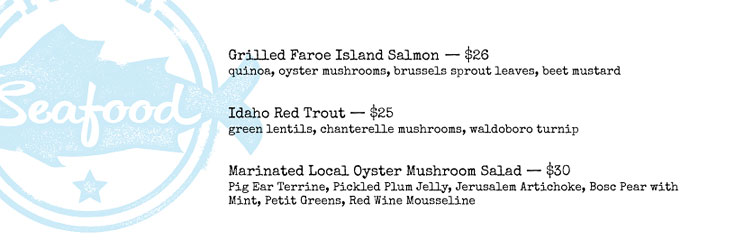
Tip! You can also use this trick with any image in the iMenuPro Artisan Image collection. For most Artisan images you can change the color and opacity of the image (makes them lighter) using the colorize box (the opacity slider appears at the bottom of colorize box).
There may be instances where you need two food items in your list with identical names, and perhaps different prices. To tell them apart you can use the Note field for each item and then use list > sort by Category/Note in the Food Items list.
Or you can use the Category field for each item along with the Category Labeler Add-on. The labeler lets you make color-coded labels and then attach them to food items in your list. The Category labeler has the advantage over the note field in that you can change the label text at any time and all food items that use the label will be automatically updated. Furthermore, you can color-code the labels for better visibility and even disable editing of food items for certain labels.
When Show Category/Note is active the first few words of the food item's category or note is displayed under the food item name in the food list. This is a handy way to keep track of food items which have identical names or otherwise need a category sort, such as by food type, restaurant name, etc.
Tip! To add a note to any food item, edit the food item and click the Note button.
You can also use the Category and Note fields to categorize (or filter) multiple restaurants under a single user account. To do so, tag each food from a restaurant with a note or category that pertains to that establishment. Then list > sort by Category/Note to group all the foods from that particular establishment together.
If you have many restaurants and the food item list grows large, consider putting each restaurant on a separate account.
To accurately position an image or floating text, try the following:
View > Grid command. You can choose the color of the grid lines and size of the grid boxes by adjusting the X and Y Units. Check the On Menu box to make the grid appear on your menu and then click OK. To remove the grid when you're done, uncheck the On Menu box. NOTE: When you print, the grid lines will not be printed so you can leave the grid on always if you want to.
View > Disable menu text. With menu text disabled only images and floating text will be active for dragging and positioning. To re-enable the menu text use View > Enable menu text
Align at center to perfectly center them within a menu style column or, if you menu has only 1 menu style column, within the page.
Custom under Spacing and change the values for Before or After to make more or less room before or after the heading.
Using Custom Spacing for Before and After
iMenuPro supports mixed multi-language use including Japanese, Chinese, Korean, Thai, Greek, Russian and others for all Menu Styles.
If you're using a language that has few spaces or no spaces between words however, you might find that long strings of text can run off the page, especially with extra large fonts. To correct this, you can uncheck the Wrap Text box for any Heading or Food Item. Unchecking Wraps Lines for an item turns off iMenuPro's auto-wrap allowing you to enter your own line breaks, and have the text appear on the menu exactly as you enter it.

Japanese Menu Sample
If your establishment is in Europe, you may need to add up to 14 symbols for the major food allergens as outlined in the EU Food Information for Consumers Regulation No. 1169/2011 and EU Food Information Regulation 1169/2001 (FIR).
The 14 allergens are:
Since the normal iMenuPro symbol options allow only 3 symbols per item, you can use the method below to add any number of symbols to an item by setting the Extras field to use the built-in SoftCafe Symbol font:
Fonts > Extras... select the font SoftCafe Symbols and set it to whatever size and color you want the symbols to be.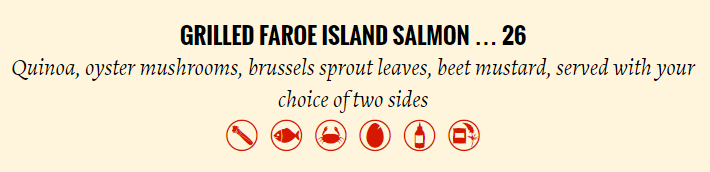
Using the Extras field for multiple allergen symbols

Using the Footer Key to explain the symbols
Tools > iMenuPro App Settings > Keep design changes when switching StylesClick a symbol to copy it's text character.
,
)
*
+
-
/
0
1
2
3
4
5
7
:
;
>
?
A
B
C
D
E
F
G
H
I
J
K
L
M
O
P
S
T
V
W
X
Y
Z
[
\
]
^
_
a
b
c
d
e
f
g
h
i
j
k
m
n
o
p
q
r
s
t
v
y
{
|
‚
ƒ
„
…
†
‡
ˆ
‰
‹
Œ
Ž
‘
’
“
”
–
—
š
›
œ
ž
Ÿ
¡
¤
¥
¦
§
¨
©
ª
¬
´
¶
·
¸
¹
º
»
¼
½
¾
¿
µ
À
Á
Â
Ã
Ä
Å
Æ
Ç
È
É
Ë
Ì
Í
Î
Ï
Ð
Ñ
Ò
Ó
Ô
Õ
Ö
×
Ø
Ù
Ú
Û
Ü
Ý
Þ
8
9
Q
R
U
u
w
x
ä
å
æ
ç
è
é
ê
ë
ì
í
î
ï
ð
ñ
ò
iMenuPro supports color emojis, which can be used to add whimsy or fun to your menus. The emojis will appear on both your printed PDF menus and your live-sync/QR menus.
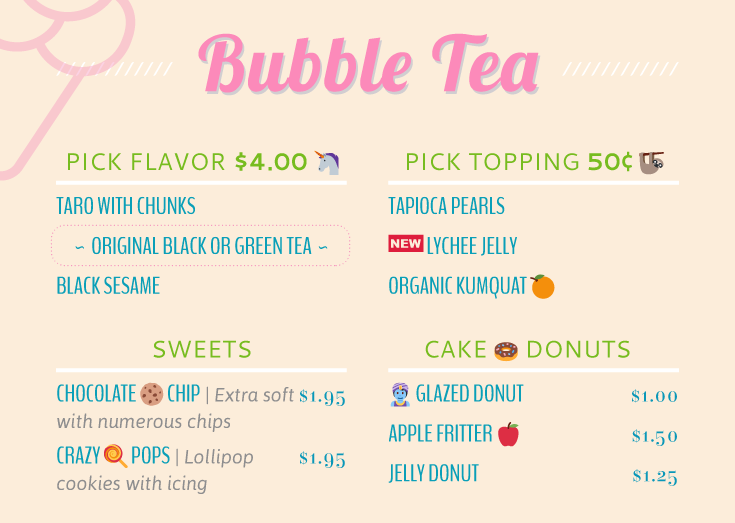
Emoji Menu Sample
If you using Windows 10 or the lastest MacOS, along with the Chrome or Safari browser, you'll be able to right-click in any text box and add the emojis.
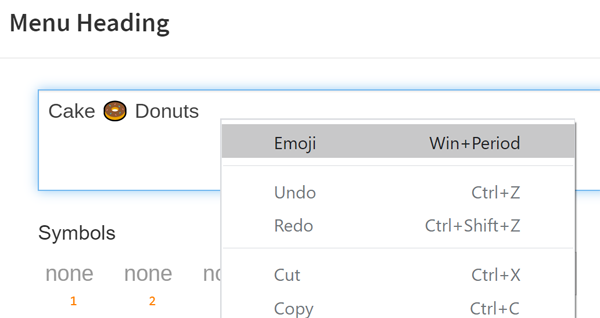
Adding Emojis in Chrome on Windows 10
If the right-click option is not available on your browser, you can visit a web page that lists emoji for copying and pasting .
Tip! Depending on your OS (Mac vs. PC vs. Chromebook) the emojis within the app (and on mobile-friendly live-sync menus) may appear slighlty different than how they appear on your PDF menus. This is because different operating systems use different emoji representations. But your iMenuPro PDF menus will always be the same - no matter what operating system or computing device you are using.
To display units in something other than the default, which is inches, use the Tools > iMenuPro App settings command to change the units.