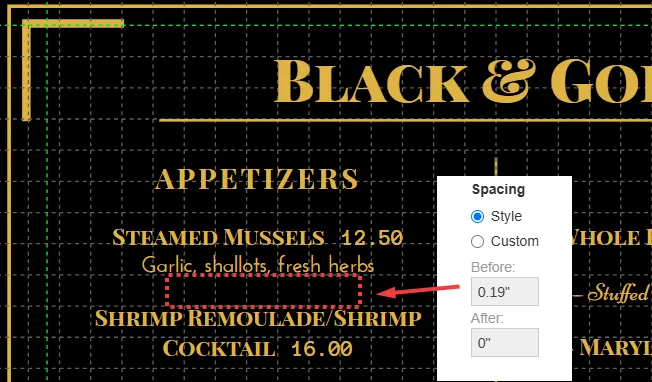
The default menu style spacing for food items on this style is 0.19” for Before and 0” for After.
“White Space Is Not Your Enemy.”
Rebecca Hagen and Kim Golombisky (from their book of the same title)
When designing menus, the spacing between food items and headings is crucial for readability and aesthetics. iMenuPro provides three general types of spacing controls: Item Before/After Spacing, Line Spacing (within items), and a unique feature called Page Spacing.
Item Spacing defines the space before and after each item (food or heading) on your menu. Measured in units such as inches, centimeters or millimeters, this type of spacing ensures consistent separation between items on your menu, making it easier to distinguish them visually.
Before Spacing: Adds space above an item, creating a visual buffer from preceding content. After Spacing: Adds space below an item to separate it from the content that follows. These settings are similar to the paragraph spacing tools in standard word processors like Microsoft Word, offering precise control over layout structure for individual items.

The default menu style spacing for food items on this style is 0.19” for Before and 0” for After.
All menu styles come from with predefined Item Spacing for the food items and each type of heading.
You can change (override) any item’s spacing by editing the item and switch Spacing from Style to Custom and then entering in new values for that particular item.
Or if you want to change the item spacing for ALL foods on your menu that not been set to custom, you can use the Design > Layout Options command and change them all at once to the values you prefer.
Line Spacing mainly adjusts the vertical distance between the lines within a food item or heading, and to a lesser degree, the space before and after the first and last line of text. Like Word, it uses a standard multiplier to determine the spacing:
1.0 represents single spacing. 1.5 creates one and a half times the single-line spacing. 2.0 doubles the spacing, often used for more formal or elegant menus.

The menu on the left is using 1.0 line spacing, while the menu on the right is using 1.5.
This setting, available under Design > Layout Options controls the density of text within the items, influencing both readability and overall menu balance.
If changed, it is applied to all items on your menu.
Page Spacing introduces a revolutionary way to dynamically adjust the spacing between items on a specific page. Unlike fixed adjustments, Page Spacing applies changes proportionally to the existing Before and After Paragraph Spacing values.
Positive Values (between 0.0 and 2.0): Increase spacing proportionally between all items on the page, amplifying the layout’s openness without distorting its proportional aesthetic. Negative Values: (between -0.01 and -0.20) Decrease spacing proportionally, compacting the layout while maintaining the same relative spacing relationships between the items. This proportional adjustment ensures the overall aesthetic of your menu is preserved, whether the spacing is expanded or shrunk.
Think of Page Spacing as a zoom slider for spacing, where the relative distances between paragraphs expand or contract in harmony, like resizing an image while maintaining its proportions. This feature allows you to fine-tune the visual density of your menu, page by page, without disrupting its design coherence.

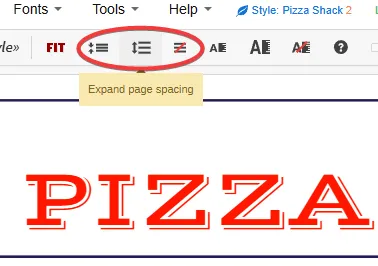
To quickly change the vertical spacing per page, use the Page Spacing buttons
You can apply page spacing by manually editing the Page Spacing value using the Tools > Page spacing command.
Or you can click the page spacing buttons on the toolbar, which apply a preset increase or decrease of page spacing based on the value set under iMenuPro app settings.
By combining Item Before/After Spacing, Line Spacing, and Page Spacing, iMenuPro provides flexibility for creating menus that balance readability, aesthetics, and efficient use of space.