Easter Eggs
A partial list of hidden features not included in the normal sections of the iMenuPro help guide.
1Search for Blanks
You can enter {blank} in the Find Food Item search box to find all blank items.
2Left indent for Extras
Within Layout Options > Left indent: you can enter two numbers separated by a semi-colon, as in num;num2 where num2 will be the Extras left indent. This lets you change the left indent for the Description and Extras independently. It works for inches, as well as mm and cm, but gets reset to one value only, if you switch units under iMenuPro settings.
3Ctrl-Z and Ctrl-Y
These work for Undo and Redo respectively. Ctrl-P works for Create PDF to Print in Chrome only.
4Jenna Sue Heart
The ^ character in the Jenna Sue font is a heart.
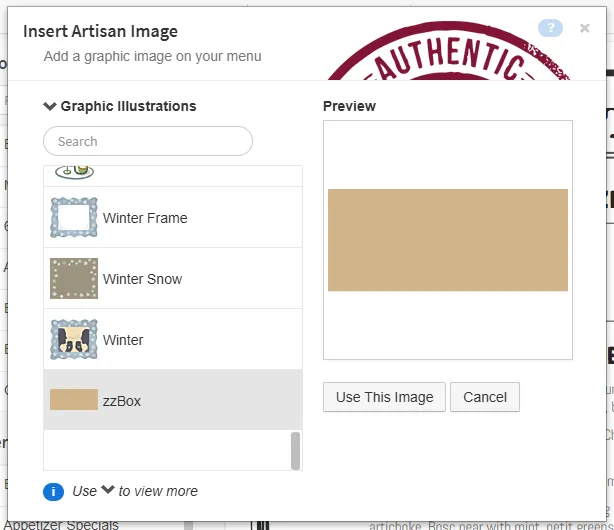
5zzBox
Found in the Artisan Image collection Graphic Illustrations, at the very end of the list, it can be colorized and used as solid box to surround items on the menu in cases were the normal box accents won’t. For example you can use it to box just a few item under Food Columns, whereas normally you cannot, since Food Columns boxing requires boxing all items in the group.
To add the box image, use Insert > Artisan image ... and under Graphic Illustration at the end of the list select zzBox.
Once you add it, drag it over so it’s on top the items you want to cover, and then size it so it fits over them.
Then right-click the image and select Underneath text which will put the image underneath the menu text.
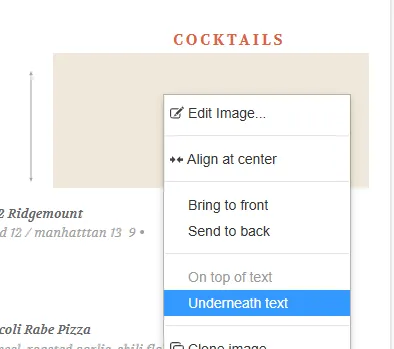
Since it’s a floating image, it should be done once your menu is completed, as any text that moves may require moving the box image as well.
If you don’t like zzBox, you can try the in app Torn Color Box collection, or you can upload your own image from the web or elsewhere and perform the same steps.
6Price Strike-through
If a semi-colon is added before the first price in a food item’s price field, and the Price layout for the menu is set to normal and the food item is non-centered, that price will be displayed with line through it (aka strike-out) $12.95
7Remove all descriptions or extras from a menu
You can select no text for Design > Layout Options > Main bullet (or Extras bullet) to remove all descriptions (or extras) so that they are not displayed on a menu. This is similar to the do not display Price placement setting under Price Options.
8Transparent Live-Sync Menu background
You can use the transparency slider for Live-Sync Menu > Background color and slide it all the way to the left to make the live-sync menu background completely transparent. This lets you to use the background image or background color on your website as the menu background.
9Logo at Top of Live-Sync Menu
If you want your logo at the top of your live-sync menu, add a {blank} food item at the top of page 1 of your menu. Edit the item and add one <space> for the food item name, and for the food item’s Layout Tweaks choose Center and Span. Then attach your logo as the item’s Food Photo. This will place the logo at the top of your live-sync menu as well.
10Spacer Symbol
The last symbol on the symbol list (to the left of cancel) is actually a spacer symbol. You can use this in symbol 2’s slot (the rightmost symbol) to push symbol 1 (the leftmost symbol) farther away from the food item. This is sometimes useful if the item has a box accent surrounding it.
11Floating Text
Will show up with a light purple box when View > Grid is on to help distinguish them from normal, menu item text.
12View Blank Items on menu
With View > Grid turned on, {blank} items show up on the menu as yellow boxes. This also applies to items with blank lines within item text, provided Wrap Text is turned off for the item. This can help identify blank items or blank lines on the menu.
13Rectangle hover colors
When re-ordering items on the menu by dragging, the hover color of the rectangle, before you drag the item, has a meaning: RED means it’s a heading with the New Page or Column option set. GREEN means the item is in the Title Span area at the top of page one of multi-column menu. YELLOW means the item is a blank.
14Styles with distinct accents
Some Menu Styles have different accents for Normal & Alt-font headings, such as Hot Dogs Plus, Crown and Plate, Jazz Cocktails, Right On, Strawberry Fieds, and Shake Chic even though changing the Normal accent with the Design > Heading Accents command for will change both Normal and Alt-font heading accents.
15Styles with colored shadows
Some Menu Styles have shadows that are pre-colored, such as The Fish House, Duck Fat, Bezo Burger, Le Monde, and El Taco (pac #2). The normal shadow color is a shadowy grey.
16Colored Stroke Fills
Some Menu Styles have stroke fills that are colored, such as The Fish House, Balthus, Fish Camp, Gran Gusto, The Buzzy Bee, Urban Pint, Ye Public House, Kids Lion King (pac #1), Ocean City Ale (pac #1), Uncommon Diner (pac #1) El Taco (pac #2), and Madison Ave (pac #2). The normal fill color for letters that are stroked is white.
17Colored chalk
When using Chalkboard two of the Board colors have a Use Colored Chalk option also. And one of the boards is a blackboard background image that includes chalk scratches.
18Print-Alike Menu Covers
When Print-Alike is enabled for live-sync, if you have a Menu Cover on your menu without Preview only checked, when you Sync, the menu cover will appear on your web menu as well.
19Customize Live-Sync with HTML
You can add some HTML codes to your items and headings to gain a bit more control over the formatting of live-sync menus, such as using <br> to force a new line. These HTML codes are ignored on printed PDF menus but not ignored on live-sync menus. For QR Ultra menus, these HTML tags are ignored.
20Split Food Column Heading
You can split a food column heading into multiple columns that align with the food columns. To apply this hack, try the following:
- For any Heading that is set to food columns of 2, enter the text for heading separated by a semi-colon with no space between the text. For example try: White Wines;Red Wines
- Uncheck the
Wrap Textbox for the heading
The heading text will now appear above the food columns as such: White Wines Red Wines
You can also do this for food columns set to 3 columns.
Keep in mind, the food items are technically still in food columns, so when ordering them, they still follow the Left/Right ordering scheme (food columns are the only mode that uses this ordering in order to automatically balance the columns). Also, this hack will not work if you have any bold bite tags within the heading.
21Custom Pseudo Food Symbols
If the natural size of a food photo image is smaller than the current Item photo size (normally 1.33 inches wide) then the image is displayed using its natural size. If that size is very small (around the size of a food symbol) then the image (or logo) could be used as a pseudo food symbol for certified or branded items food items.
22Quickchange Price
When viewing a wide list there is a quickchange price option that when clicked, allows price edits directly in the food list without having to use a pop-up modal. Like all list edits, price edits effect all menus that the item appears on.
23Smart Accents
Two accents have self-adjusting thicknesses: the Ornament Sidelines Baseline accent and the Text-Width Matching Underline accent. For these two accents the thickness of the line is based on the text’s font size.
24Background Image Color Change
Like changing paper colors, you can apply the paper color to a background image (especially if the background for the image is white) using the Duopaper filter. By doing so you’re able to, in effect, have a paper color and background image at the same time.
25Monospace for Pseudo-Columns
In some cases you may want to have your entire menu in columns, and then have another column inside one of those columns (a column within a column). There’s no set feature for this, but you can use a monospace font like Fira Mono with Wrap Text off. And then just enter the items as a single heading or single food item. Since monospace fonts use the same character width for EACH character, you can space them out exactly to make your own pseudo-columns.
Here’s an example with the Extras font set to Fira Mono, with an item that uses just the Extras field with Wrap Text unchecked.
26Update Your Menu’s Version
You can update your current opened menu to the latest menu version that iMenuPro uses by viewing the About box Help > About iMenuPro and comparing the latest menu version to your current menu version. The latest is displayed in parenthesis, after the iMenuPro version: Your menu’s is displayed in parenthesis after mi:
If your menu version is less than than latest, and you want to update it, do the following:
- First use
File > Make a Copyas updating a menu’s version may change that menu’s formatting, depending on what features the menu is using. - Once the copy is made, view the About box using
Help > About iMenuPro - Check your menu’s version to see if it’s the latest. If it is, you’re already set. If not, continue to step 4
- Wave your mouse just to the left of
iu:in the empty space there, and when a tooltip appears click in the empty space. An orange β will appear. - Next wave your mouse to the far right of
cl:until a grey hard disk icon appears. - Hover your mouse over the icon, and then slowly click the hard disk icon 3 times.
- You’ll then be prompted to confirm a menu version update. If you’re ready, click OK.
- That’s it! The new menu version will now appear in the About Box and your menu will be re-displayed using the latest menu features.
- Caveat: Although you cannot “Undo” the update, you can use
File > Revertto revert the menu back to the way it was when it was last opened. This would include prior menu version as well.
27Live-Sync Permalink
Update: This feature is now built-in to Live-Sync via the QR screen.
You can have a permalink to your live-sync menu, even if you don’t post it to your website or even own a website and without any embed code. Here’s how:
- Use
Tools > Live-Sync menuto create and your sync your menu. - Make sure your menu is synced, i.e., click the
Sync Nowbutton. - Click the
Tweetbutton. - When the Twitter tweet box appears copy out just the menu URL part of the tweet.
- The permalink URL can now be send it to anyone enabling them to view the most recently synced version of that menu.
- The permalink URL can also be used as your Menu Link URL on your Google Business Profile page.
28Keyboard Shortcuts
You can use Ctrl-Enter in the data entry modals like Food item, Heading, Floating text, etc. as a shortcut for clicking the OK button to speed up data entry (use the ⌘ command button on the Mac instead of Ctrl). There’s also a few File > shortcuts listed in the file drop-down menu itself like Ctrl-S for File > Save menu. And of course Ctrl-Z Ctrl-Y for Undo/Redo work as well.
29QR Heading Tabs with HTML
You can exclude/include certain headings from your QR menu heading tabs with a bit of HTML code in the heading text itself. To exclude a normal heading, use <span class="imp-no-tab">Opt Out heading text</span> To include a Title or sub-heading use <span class="imp-yes-tab">Opt In heading text</span>
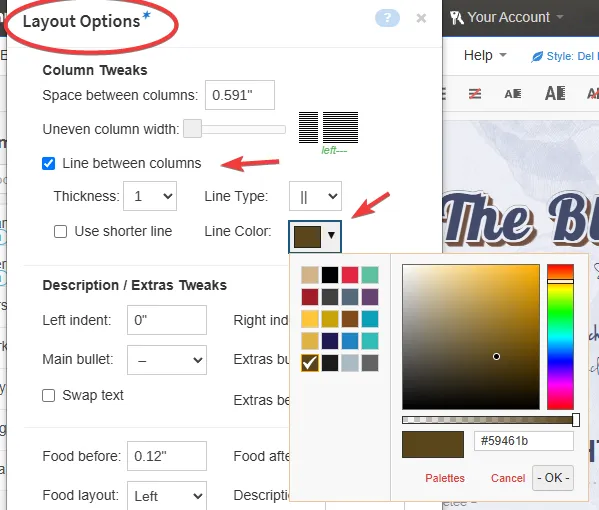
30Color + Line Color Accents
If an accent thumbnail shows color + line color, you can customize each independently. The fill color will use the standard accent color, while the line color is adjusted in Layout Options near Line between columns.